


News and Articles
Related Product


Share Article
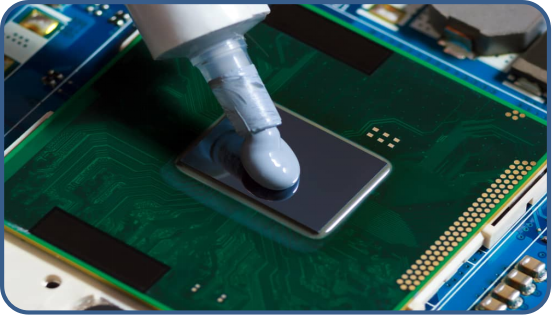
How to Install Thermal Pad in M2 SSD - How to Use a Thermal Pad for SSD
Step 1 Prepare the First Thermally Conductive Silicone Spacer
Use the thermally conductive pad to conduct heat from the front and back of the M.2 SSD to the heatsink. Each side of the thermally conductive silicone spacers may have a protective film on it, so make sure to remove all of them before use. Use a pair of tweezers to remove one side of the protective film from one of the thermal pads.

Remove the thermal film from one of the thermal gaskets.
Step 2 Install the First Thermal Gasket
Align the exposed side of the thermally conductive silicone gasket with the bottom tray portion of the heat sink assembly.

Thermally conductive silicone gasket into heat sink tray
Lower the thermally conductive silicone spacer so that it covers the tray evenly.
Thermally Conductive Silicone Spacer into Heat Sink Tray

Gently press the thermally conductive silicone spacer with your finger so that it adheres to the surface.

Gently press the thermal conductive silicone spacer
Step 3 Prepare the second thermally conductive silicone gasket

Use a pair of tweezers to peel one side of the protective film away from the remaining thermally conductive silicone gasket.
Thermally conductive silicone gasket protective film peeling off
Step 4 Install the second thermal pad

Align the exposed side of the thermal pad with the top of the heat sink.
Thermally conductive silicone gasket placed on the heat sink
Lower the thermally conductive silicone gasket so that it covers the top evenly.

Thermally conductive silicone gasket on heat sink
Press the thermal conductive silicone gasket gently with your finger so that it adheres to the surface.

Press gently on the thermal conductive silicone sheet
Step 5 Remove the Bottom Thermal Conductive Silicone Gasket Protection Film
Use a pair of tweezers to remove the protective film from the thermal pad on the tray. The thermally conductive silicone pad may lift off the tray as you remove the protective film - this is normal. Use your fingers to place the pad in the tray.

Removing the Protective Film on the Other Side of the Thermal Conductive Silicone Pad
Step 6 Place the SSD in the tray

Place the M.2 SSD into the tray with the side with the most chips facing up.
SSD into heatsink tray
Make sure the SSD is centered in the tray. The tray should not cover contacts or screw cutouts.

Thermally conductive silicone spacers aligned with the tray

After the SSD is placed in the heatsink tray
Step 7 Remove the Top Thermal Silicone Gasket Protection Film
Use a pair of tweezers to remove the protective film from the top of the heat sink.

Removing the Heat Sink Thermally Conductive Silicone Gasket Protective Film
The thermally conductive silicone pad may lift off the heat sink when removing the liner - this is normal. Use your fingers to hold the pad in place.
Step 8 Snap the Heat Sink into Place
Align the top heat sink section with the SSD and tray.

Installing the Heat Sink
Press the two halves together firmly. You will feel it "snap" into place.

Pressing the Radiator into the Radiator Tray
After installing the heatsink
Step 9 Check radiator alignment

Check that the heatsink is installed correctly
In order for the SSD to be installed in a desktop PC or PlayStation 5, the heat sink needs to be centered on the SSD. Make sure the heatsink is close to the screw cutouts but not overhanging. If you are having trouble installing the SSD, you may need to adjust the position of the heat sink slightly. Slide the SSD between the two halves of the heat sink assembly with your finger until it is installed correctly.